Ok, let's see if we can get through this post without my computer getting all screwy!
(*UPDATE: By the end of this post, I had to hook up my laptop to my television so that I could use it as a monitor.)
Yes, I am terribly consistent at blogging (ha), but between the project I am about to share and Apple telling me that I need a new display for my laptop, it feels legitimate that I haven't blogged in two weeks.
Oh, and summer.
Let's not forget the pull to do nothing...that's a big factor too.
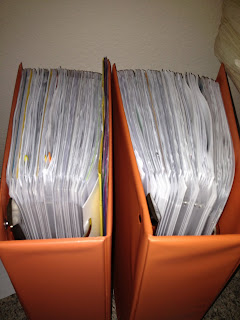
In any case, I have been in the midst of a massively gigantic project: organizing all of the master copies for second grade.
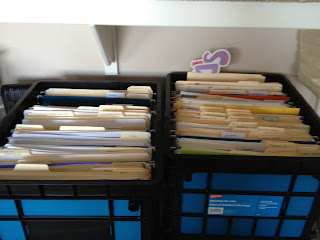
Two file boxes of papers have now been condensed down to two 3" binders. Hooray! I anticipated this job to be simple, as I already had my papers organized by month and subject. While typing the information for the labels and printing them took about an hour, the remainder of the project took somewhere in the neighborhood of 18-20 hours to complete.
Mind you, this is because (as we know) I am ridiculous and wanted to create all of the dividers myself.
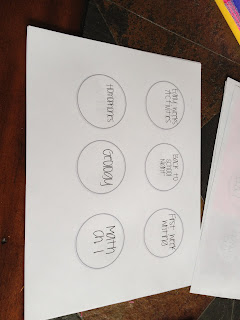
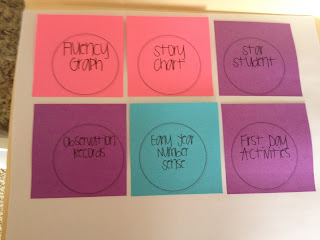
Start by creating a circle design in powerpoint, and type the divider labels into the template.
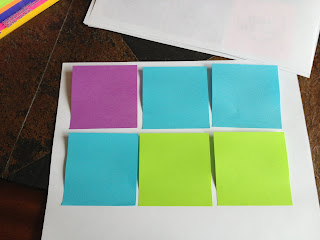
Next, place post-it notes over the circles in whatever pattern you want. I color coded my binder so that each color reflected a subject.
Now for the fun part! Stick the post-it-noted paper back into your printer! Best idea ever! Thank you
Ladybug's Teacher Files! Now all of my tabs matched in size and in handwriting.
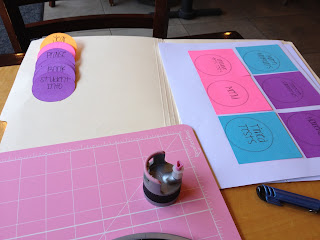
At this point, the ridiculousness sort of began. I now had labels for months, as well as labels for every subject that we covered for the whole year. They were all printed nicely on post-its and looked beautiful....but all of these had to be cut out. Yay. The trusty circle cutter came out for this big job. Circle labels are my favorite. They turn out so consistently. Sometimes I have issues with my straight edge slide cutter because things don't line up properly and lines aren't entirely parallel.
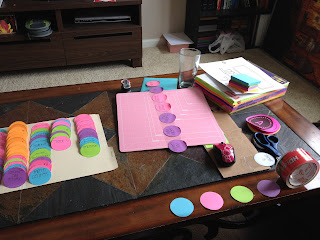
From where I sit, I am about 20 minutes away from the nearest laminating machine. Cost of gas and cost of lamination taken into consideration, I had some HD Clear packing tape handy and opted for that cheap form of fake-laminating. It actually wound up working better than if I had laminated them because I was able to leave a strip of the sticky post-it exposed. This allowed me to store them neatly together until I was done, as well as to carefully position them onto the card stock divider sheets in perfect alignment.
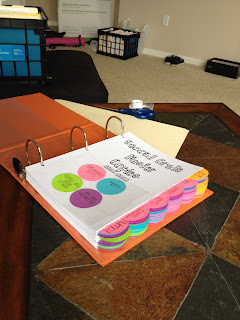
Toss in a handy cover sheet, and now we are all ready to load it up!
That's right! Up until this point, the hours of organization were spent creating the framework to organize! Hooray!
From this point on, it was just a matter of sliding my masters into sheet protectors and placing them into their respective binder category. Which took a good amount of time sitting in front of the TV...practicing my multi-tasking...
In the end, one binder was not enough, and I had to make another trip to Staples to pick up a second....and if we're being realistic, I probably over-squeezed into both...because having a third binder that didn't match in size was not an option.
And, for all of you who are thinking, "Why not scan all of this?"
I thought of that.
About 3/4 of the way through making the dividers.
Plus...I would have to print out a master copy anyway when we got to needing that activity in the future. Ultimately, I am not teaching second grade next year, and my classroom doesn't have much storage. So now, instead of storing two file crates full of junk, I only need to find space for two binders stuffed with junk!
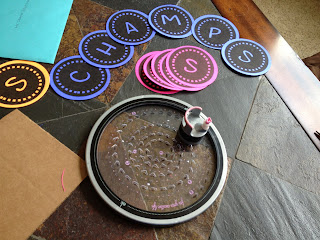
Now on to the next 125 hours of my 150 hour independent study! Bring on the grade level CHAMPS posters!...and some more circle cutter bonding.